Translate

Monday, October 29, 2018

More on the Black Doris Plum

Several years ago I did a post about my disappointment with a Black Doris plum tree I'd put in (read here). It had been in this spot for about 7 or 8 years, but had done absolutely nothing, barely growing a few inches in the whole time it was there and never fruiting at all. It was obviously in the wrong place, so I eventually dug it out and replaced it with an Apple tree.


At the time, I decided to give it one last chance to redeem itself by planting it somewhere else in the garden. My options were limited and the only place I could find was a more shady position towards the bottom of the gully, a short distance from the other plum which is its pollenator. Even so, I didn't hold out much hope for it ever doing anything spectacular.


So I planted it in this garden and basically forgot about it.


To my surprise it started showing signs of growth within a season or 2, however I was still sceptical about it doing much else.


So, you can imagine my joy over the last couple of seasons seeing it blossom and finally beginning to bear fruit.

It seems my perseverance has paid off. In total it's taken about 12 years to get it to this point. I'm rather glad I didn't give up on it like I was very tempted to do when it didn't grow very well in its first location.


Wednesday, October 10, 2018

Clivias

If I could recommend any flowering plant for a shady garden like mine it would be the Clivia. They’re incredibly easy to grow and provide a great splash of colour in the garden at spring time.


I have 3 varieties or colours in my garden  – a strong orange, a pale orange and a pale yellow one. They have long leathery dark green foliage, make a good space filler all year round and contribute to the lush tropical theme I'm creating in my garden. The plant itself needs very little attention, however they do multiply like mad so may need to be divided up every now and then. One plant will soon fill a large space.


I feel a little bit silly having originally bought my first one from a garden centre, as they're so common where I live. The pale orange one was given to me by a friend who had too many in her garden and was thinning hers out. The biggest threat to the Clivias in my garden are snails who can make a bit of a mess of things sometimes although I haven't put much effort into controlling them so it's not a big deal.


The only down side for me is that they kinda resemble Agapanthus which I don't particularly like. Thankfully, they're nowhere near as invasive or weed-like. 
The pale yellow one's my favourite...

-----------------------------------------------------------------
October 2019

This picture illustrates how well the Clivias seem to thrive in shady conditions. These are growing under a dense canopy of Punga ferns and Kanuka trees. They get plenty of water here in the gully which is a natural water course, and turns into a little stream after a downpour of rain.

Another plant that also grows well in these conditions is the ornamental Taro.


Wednesday, September 12, 2018

Update on the Chooks

Chooks are funny creatures! And smart too.
They each have their own personality. One of the chooks is quite placid. The others are more adventurous and one in particular is quite naughty – a kind of ringleader – and is leading the others astray. We’re currently engaged in a battle of wits.


Over the months since we’ve had them I’ve had to modify their enclosure countless times, because they keep getting out. Not that I don’t appreciate the whole Free-range concept but when they get out, they leave their droppings everywhere and get into the neighbours veggie patch which I’m sure they don’t appreciate.

Each time I've managed to find the slight opening through which they’ve managed to squeeze out, but after checking all around the perimeter of their enclosure for the umpteenth time I’m totally baffled as to how they keep getting out. I thought they might be flying over the fence, so we clipped their wings. Next thing they’re out again! They even come looking for us in the house as if they’ve come asking to be fed. And yet they’re not that hungry. It seems they just like the attention... or the challenge.

Each time I walk them back to their yard they come scurrying after me like little puppy dogs trying to trip me up on the steps. They’d be quite entertaining if they weren’t so annoying!

Anyway, they're keeping us well stocked in eggs, laying about 4 eggs a day, and they’re good sized eggs too. Once one of them layed a freakishly huge egg that had 2 yokes!


They’re great entertainment for the grandkids when they come around. But if they don't wear enclosed footwear the chickens go after their toes, pecking them like they’re a tasty treat of deliciously fat huhu grubs.


Now that spring’s arrived I’ll probably spend a bit more time up in the garden near the chooks. Perhaps then I’ll figure out how they keep getting out and put a stop to it, before I get the garden cranked up again.

Read more about the chooks here

Thursday, June 14, 2018

Caring for Chooks

I’ve thought about getting chooks many times over the years but it was Marie who finally convinced me we should do it. After trimming the big pine tree up the back we now had a nice clear space to accomodate them. So the first job to do before we even got the chooks was to build them a little house or chicken coop.


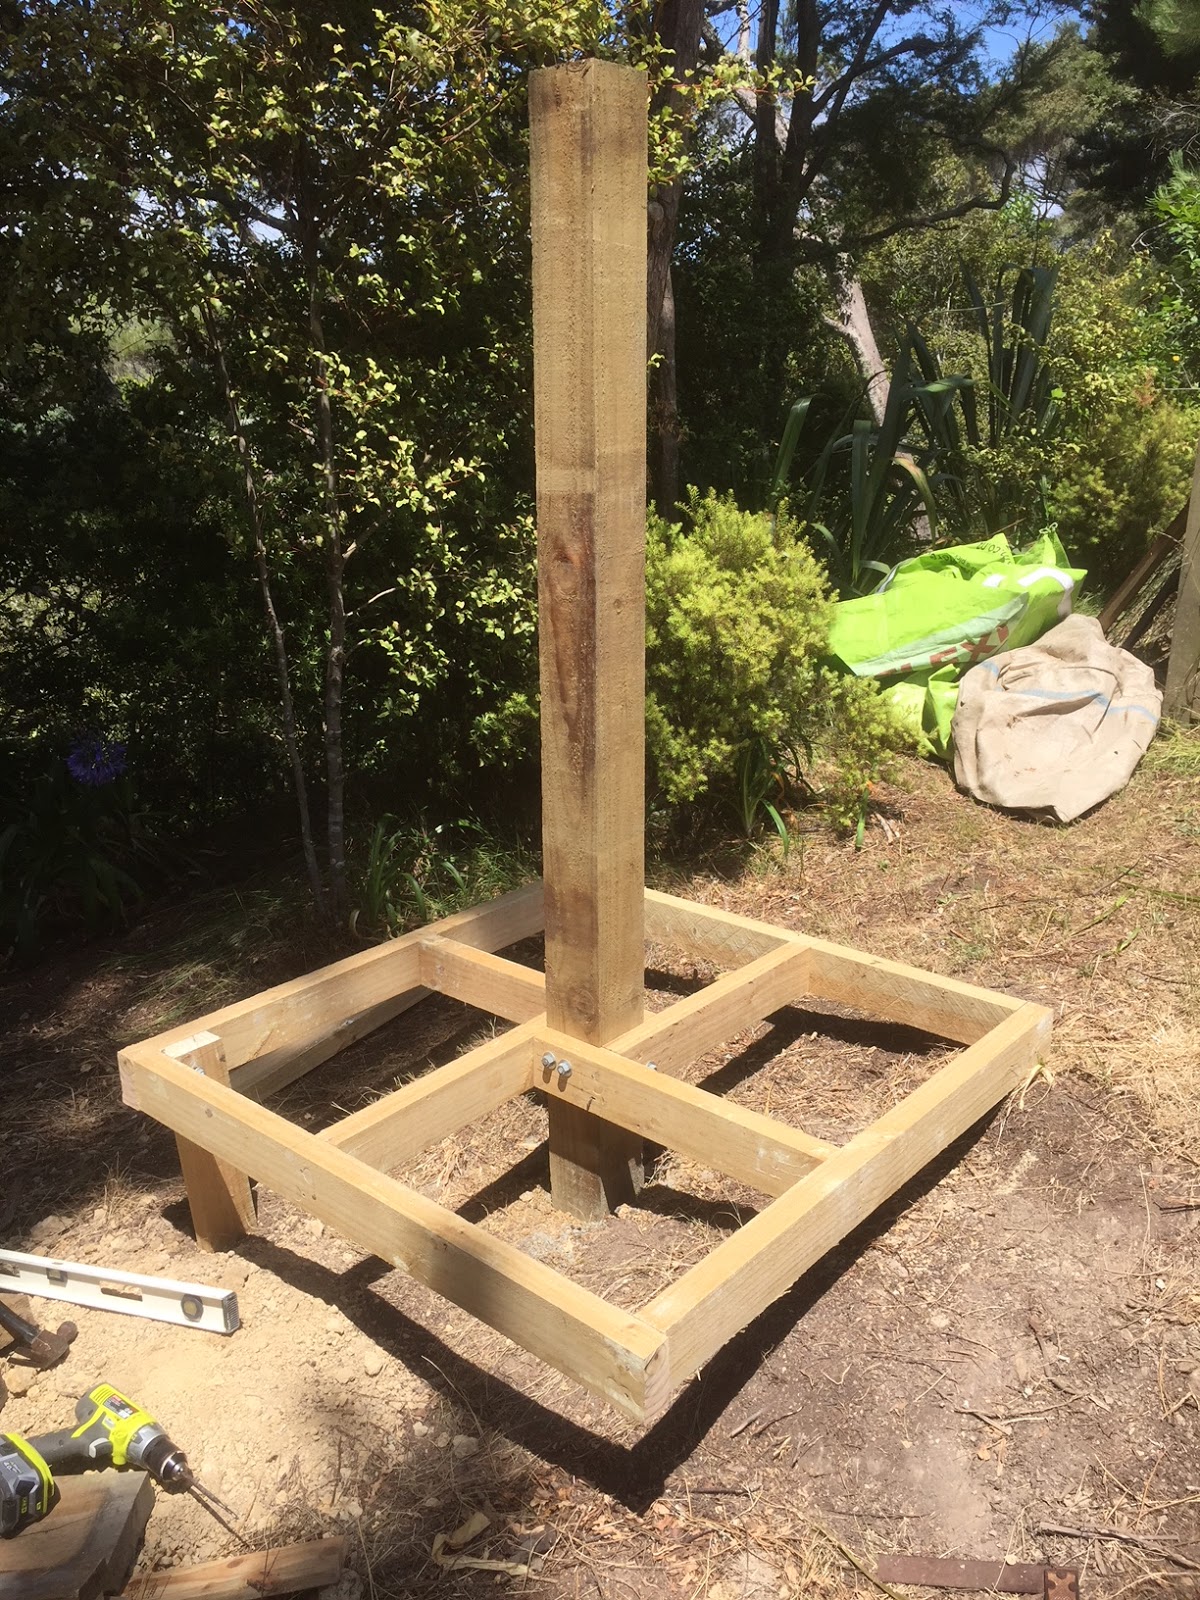
I decided to start with a single tanalised post in the ground and then built a frame for the floor out of 100x50mm rough sawn timber and bolted it to the post. Then I attached a sheet of plywood. When I tried standing on it, it wasn’t taking my weight as it was pivoting on the bolts, so I attached some legs to help support it.

I built each of the 4 sides on a flat surface from a plan I’d drawn, using 50x50mm battens in the corners to enable screwing the four sides together. I used the same battens to attach a couple of plywood shelves which finally resulted in a multi-level dwelling for them. I attached a few perches fanned out in a circle around the post so that they could easily make their way up and down as well as a simple ladder. I added a few little hinged doors in positions where I hoped the chooks would lay their eggs.

In one side of the coop I put a large door, hinged at the bottom to enable easy access for cleaning. The roof is also hinged at the apex on one side and is a handy way of taking a quick look inside. All that was needed then was some dried out grass clippings for them to make a nest out of and to make it more comfortable and homely.

When we first got the chooks they were still quite small and we were a bit worried about letting them roam freely in the yard until they got a bit bigger in case a cat decided to have one for dinner. So we started them off in an old ginea pig run. Then we made a little connecting tunnel with some plastic mesh to join the two together.


It was an exciting moment when we finally introduced the chooks to their new home. Amazingly, they made their way straight to the top floor to check out the view, which also brought them up to eye level for a face to face meeting.

They were still quite young at this point so it would be a while before any eggs would be laid.


Wednesday, June 13, 2018

Treework

Maintaining trees on my property is an ongoing job. If it’s pruning fruit trees or trimming off the odd limb that gets snapped off in a storm, I can usually handle those jobs. But from time to time bigger jobs arise that I simply can’t do on my own, as was the case earlier this year.

Following a rather severe storm a couple of years ago a huge pine tree up the back of my place had a large limb, high up in the tree, snap off. It had been dangling precariously for a couple of years, which was becoming a bit of a safety concern whenever I was walking underneath it in that part of the garden.

I had hoped a future storm would dislodge it fully, half hoping it would come crashing down by itself so I wouldn’t have to pay to get it dealt to, but that didn’t happen.

So I decided to get an arborist friend of mine to come and trim off the broken branch and at the same time remove a few of the lower lateral branches which I hoped would also let more light in the garden.


So, after clearing a safe area to work at the base of the tree, he slung a piece of rope up over a high branch then abseiled up the tree with a chainsaw and started cutting. Here was a man impressively skilled in what he does! Within a very short time he was dropping each cut limb perfectly on the ground just where he wanted it.


Before long there was a huge pile of wood gathering below which I (as ground assistant) was clearing away so he could continue working safely. I was amazed at how quickly he got the job done, so while I had him there, I had another job in mind for him to do.


On my property I also have some very tall Ti trees (Kanuka) that have started dying off. When that happens the branches become very brittle and easily snap off in high winds. Neil made it look easy but you can tell by the expression on his face, it was anything but. You need to be very physically strong and agile to do what he’s doing. I was super impressed with his accuracy, as immediately below I had many plants and shrubs that I feared would get damaged with falling branches and debris. But he managed to carefully lower each and every branch onto a clear area of ground only 2 or 3 square metres in size and nothing got damaged.


Inevitably, there was a huge pile of branches to clean up, which required me to expand my firewood storage, so I knocked together a drying rack out of waste timber I had lying around.

This should keep us stocked up for a while.

But better still, all this work has created a nice clear well lit area in the garden where we’re now thinking of putting a few chickens.

That’ll be next.

Wednesday, May 23, 2018

The Sleepout #10 – Finishing off the Decking

Note: This article is part 10 in a series of articles about the sleepout I built in my back yard back in 2011. If you want to read the whole series of articles from the beginning start here

I’m very pleased with how the decking’s turned out and now that I’ve got decking all around the sleepout, it’s a much more usable space. But because we get so much rain, the next task was to get some roofing up over the deck.


All the rain we’ve been having has given me a chance to ensure the drainage I put in was working as I’d hoped. This would be really important once the roof is up as it would probably collect twice as much water as it did before. Thankfully, I’m now up and out of the dirt which in this weather can quickly turn to mud.

  Because the decking goes right up to the boundary, I decided to build a fence for privacy which would also create a bit of shelter from the wind, resulting in a cosy little space for BBQ’s and general outdoor living. At some stage I will probably install a door on the back wall of the sleepout for easy access to this space.


Now that the roof is on I just need to add some guttering and flashings to finish off the roof. Plus I still need to finish off the last bit of fencing and I’ll probably install some outdoor lighting too.
I love being able to walk all around the sleepout now, enjoying the garden outside in all directions, even when it’s raining.

It still remains to be seen whether the winter conditions inside the sleepout will be any warmer and dryer now that I’ve extended the roof. I hope by doing so it will help to keep the ground dry underneath it.

See what happens next here

Monday, February 26, 2018

The Sleepout #9 – Stormwater Drainage

If I was ever going to address the issue of stormwater drainage under the sleepout, then NOW would be the best time to do it. In view of all the decking I’m putting around the sleepout, once the decking’s in place it will be too difficult to deal with it later.


So, after figuring out where my posts for the decking would go I dug a trench between them which continued under the sleepout in a downhill direction.

There is always a lot of water seeping through the soil after it rains so I opted for nova-coil piping which has lots of little holes in it which will act as a kind of sieve so all the water can drain out of the soil and escape down the pipe. The free draining volcanic scoria will also help the water to drain away. The aim was to create a kind of soak hole outside the perimeter of the sleepout which will collect any of the water seeping through the soil. Then, by means of a vertical section of drain connecting to the nova-coil the plan was to finish off with a layer of concrete shaped like a dish to collect any surface water and feeding it down the same pipe. 
  

This required a bit of support by means of a small retaining wall which would essentially act as a dam holding everything in place. 


I also dug a trench under the sleepout using more nova-coil pipe and back filling with scoria. I made sure there was a reasonable gradient on the trench so no water would sit and pool anywhere but instead would drain away quickly. Hopefully this will reduce the amount of moisture sitting around under the sleepout and this will contribute to keeping the sleepout warmer and dryer than before. 


Finally, I created the concrete dish on top. Now I can carry on with completing the deck.

Read next article here